

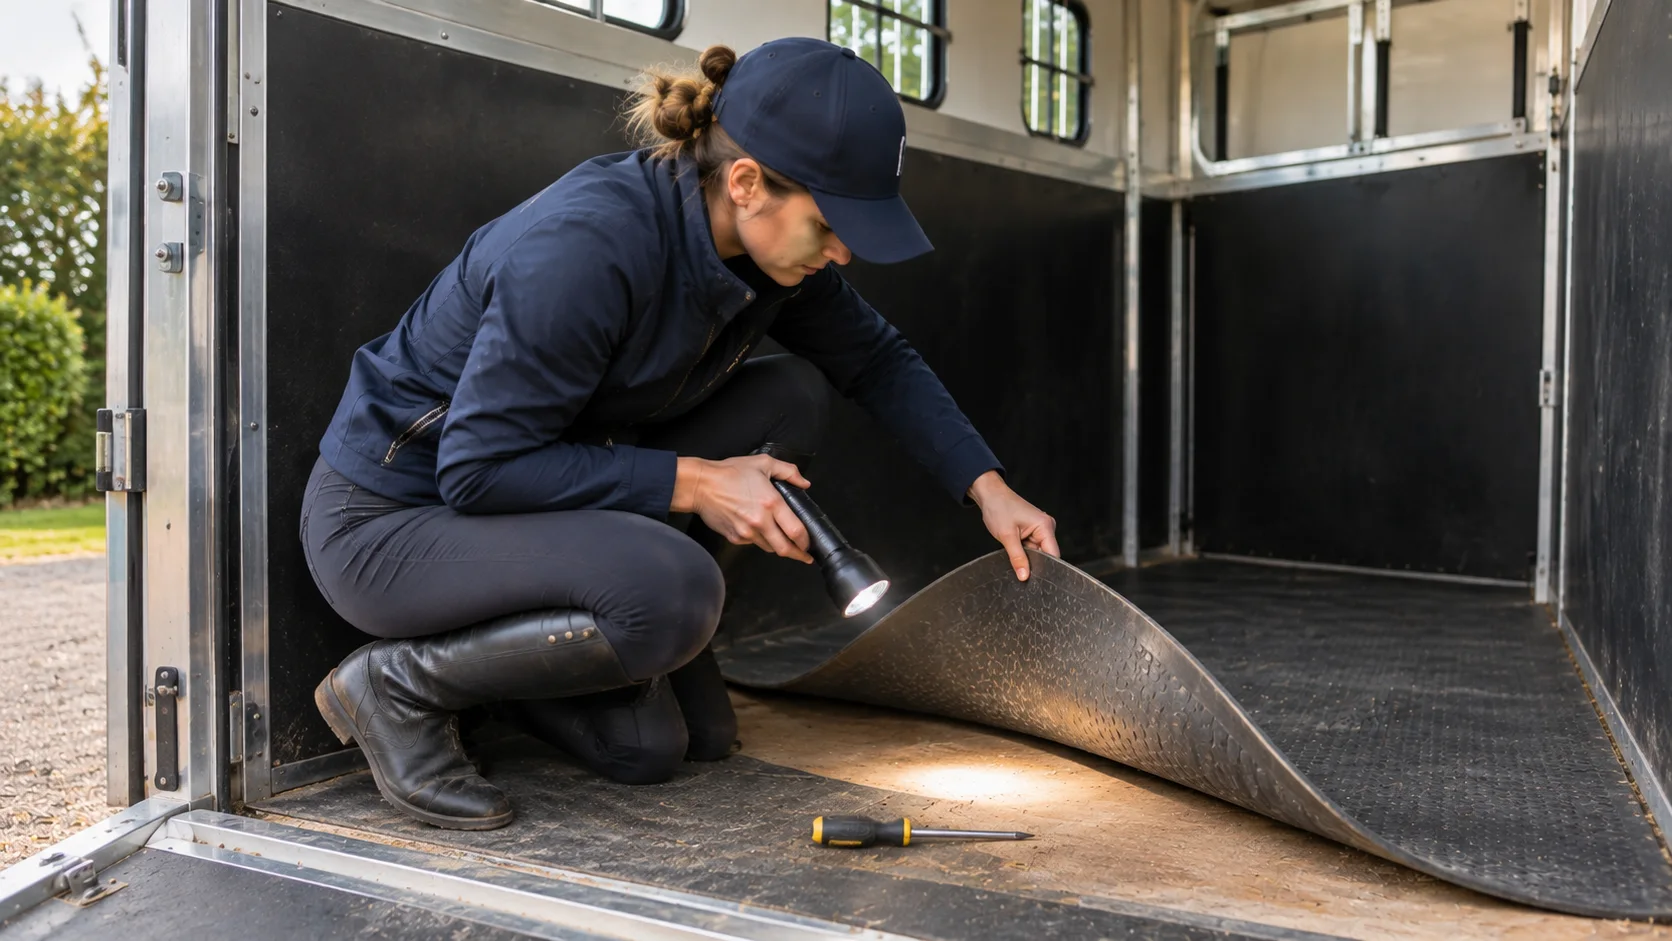

The horsebox floor carries the full weight of a moving horse, soaks up urine and washing water, and is usually hidden under thick rubber matting. That combination makes it the most dangerous part of any horsebox or trailer to neglect. Floor failures are rare, but when they happen the consequences for the horse are severe, which is why GOV.UK guidance tells owners to inspect the floor regularly, including under matting or plates.
This step-by-step guide shows you how to inspect timber, aluminium and steel floors, what the warning signs look like and when to stop using the vehicle.
Key points
- Lift the matting. A floor cannot be checked from the top of the rubber.
- Check from above and from underneath the vehicle.
- Soft, dark, flaking or crumbling areas mean the vehicle should not be used until repaired.
- Keep the floor dry: muck out after every trip and let it air.
Why horsebox floors fail
Most horsebox floors are made of marine plywood or hardwood boards, aluminium planks or steel sheet on a steel or aluminium frame. Timber rots when urine and water sit under matting with no chance to dry. Steel corrodes, particularly at welds and where it meets other metals. Aluminium resists rust but can corrode where it touches steel and can crack at fixings. Age, repeated wetting, road salt and heavy horses all speed things up.
What you need
- A strong torch or head torch.
- A screwdriver or bradawl for probing timber.
- Gloves, knee pads and old clothes.
- A phone to photograph anything you find.
- A helper to lift heavy matting safely.
Step-by-step floor inspection
- Park on level ground and make it safe. Engine off, handbrake on, keys out. For trailers, chock the wheels and keep the trailer hitched or on its corner steadies.
- Remove bedding and lift the matting. Roll or fold mats back section by section. If the mats are bonded down, check edges, joints and any cut-outs as far as you can, and plan a full inspection with a professional.
- Look at the surface. Dark staining, delaminating plywood, swollen boards, cracks, gaps at the joints and white powdery corrosion on aluminium are all warning signs.
- Probe timber. Press a screwdriver firmly into the boards, especially at the edges, around fixings and where horses stand. Sound timber resists. If the tip sinks in easily, the wood is soft.
- Tap and listen. Tapping with the handle of the screwdriver gives a dull note on rotten areas compared with sound ones.
- Check the frame from underneath. With a torch, look under the vehicle at the crossmembers and the floor’s underside for rust, flaking, holes, sagging or daylight showing through. Never go under a vehicle supported only by a jack.
- Check the ramp in the same way. Ramps take high point loads from hooves and suffer the same rot and corrosion, plus wear on hinges and springs.
- Record what you find. Photograph each area so you can compare at the next inspection.
- Dry, clean and refit. Let the floor dry fully before putting the matting back.
Warning signs and what to do
| What you find | Likely cause | Action |
|---|---|---|
| Screwdriver sinks into timber | Wet rot | Stop using the vehicle; get it repaired |
| Plywood layers separating | Water ingress, age | Professional assessment |
| Flaking rust on steel floor or frame | Corrosion | Professional assessment, may need welding |
| White powdery deposits on aluminium | Corrosion, often at steel contact points | Monitor and get advice |
| Floor flexes or creaks when you stand on it | Weak boards or frame | Do not load horses until inspected |
| Daylight visible from inside | Holes or gaps | Do not use until repaired |
Preventing floor problems
- Muck out after every journey. Remove droppings, wet shavings and urine-soaked bedding the same day.
- Lift and air the matting regularly, particularly after wet journeys.
- Wash sparingly. Pressure washing drives water under matting. Mop instead, then dry.
- Store with ventilation. Leave vents open and ramps slightly open where safe, so moisture can escape.
- Inspect on a schedule. Every few months, after storage and before buying.
- Service professionally. Ask your mechanic or horsebox specialist to check the floor and frame at every service.
Buying second-hand? Check the floor first
Floors are one of the most expensive things to repair on an older horsebox, and sellers do not always know their condition. Always lift the matting before you buy, or pay for a professional inspection. Our guide to buying a used horsebox covers this and the other checks worth making.
Trailers need the same attention
Horse trailer floors fail for the same reasons, and many older trailers have timber floors. Because light trailers do not need an MOT, nobody else will check the floor for you. The National Trailer and Towing Association offers free safety checks on trailers up to 3,500kg, which is a sensible extra pair of eyes. Combine floor checks with the rest of our horsebox safety checks.
Frequently asked questions
How often should I check my horsebox floor?
Do a quick visual check before each journey and a full inspection with the matting lifted every few months, after storage and before buying.
Can I repair a rotten horsebox floor myself?
Small cosmetic repairs may be possible for experienced DIYers, but structural floor and frame repairs should be done by a horsebox or trailer specialist.
Are aluminium floors safer than wooden ones?
Aluminium does not rot, but it can corrode and crack. No floor material removes the need for regular inspection.
Summary
Lift the mats, probe, tap, look underneath and record what you find. If anything feels soft, flexes or shows daylight, keep horses off until a professional has looked at it. For official guidance, see GOV.UK.